 Pop Studio
How to Make a Photo Collage on Android: Layouts and Spacing
A step-by-step guide to building a balanced photo collage in Pop Studio: choosing layouts, framing photos in each cell, picking a ratio and getting the spacing right.
A good collage looks effortless, but anyone who has tried to make one knows the small frustrations: a face cut in half by the cell edge, photos crammed together with no space, a square layout that gets cropped when you post it as a Story. A photo collage maker on Android should solve those problems with a few clear controls, not a manual.
This guide shows you how to make a photo collage in Pop Studio, with the focus on structure: choosing the right layout for the number and shape of your photos, framing each photo inside its cell, picking the right ratio, and using spacing to make the result look designed rather than thrown together. Decoration (stickers, text, filters) has its own guides; here we get the foundation right.
By the end you will know how to go from a handful of photos to a balanced, well-spaced collage that fits the place you are posting it, and you will have a checklist you can reuse every time.
Before you start: choose photos that work together
Collage layouts are only as good as the photos you put in them. Spending thirty seconds on selection saves several minutes of adjusting later.
Pick a hero and supporting shots
Most strong collages have one main photo and a few supporting ones. The hero is usually a wide scene or the best portrait; supporting shots are details, close-ups or reactions. In our example, a tall mountain landscape is the hero and a green hillside, a matcha drink and a villa entrance tell the rest of the trip.
Mind the orientation
Portrait photos fit tall cells, landscape photos fit wide ones. If you have mostly tall photos, a layout with columns will crop less. If you have mostly wide photos, rows will suit them better. You can still reframe inside each cell, but starting with a good match helps.
How many photos?
Pop Studio's Collage card says it plainly: "Up to 9 photos". Two to four photos give each image room to breathe. Six to nine work well for a recap, like a whole weekend or a birthday party, where the overall impression matters more than each detail.
How to make a photo collage, step by step
The seven steps below follow the order of the tabs in the collage editor, so you can work left to right without jumping around.
Step 1: start a collage and select your photos
On the home screen, tap Collage (or the Collage icon in the Quick tools row). The Android system photo picker slides up.
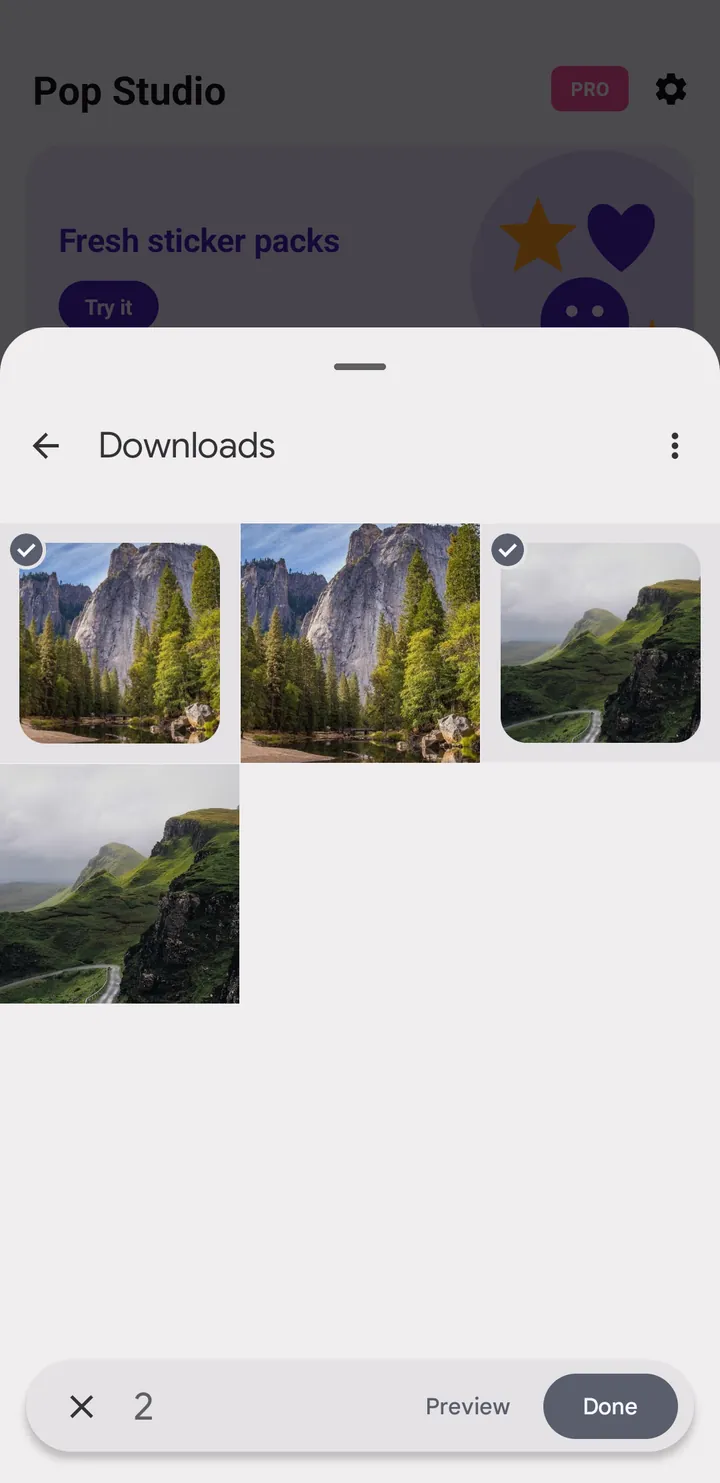
- Open the album that holds your photos. Tap the back arrow at the top to switch between albums such as Downloads or your camera folder.
- Tap each photo you want in the collage. Each one gets a check mark, and the counter at the bottom shows the total.
- Tap Preview to check them full size if you are unsure.
- Tap Done to open the collage editor.
Because Pop Studio uses the system picker, it never asks for permission to read your whole gallery. It only receives the photos you tapped, and it edits them on your phone without uploading anything. Our privacy policy explains this in full.
Step 2: choose a collage layout
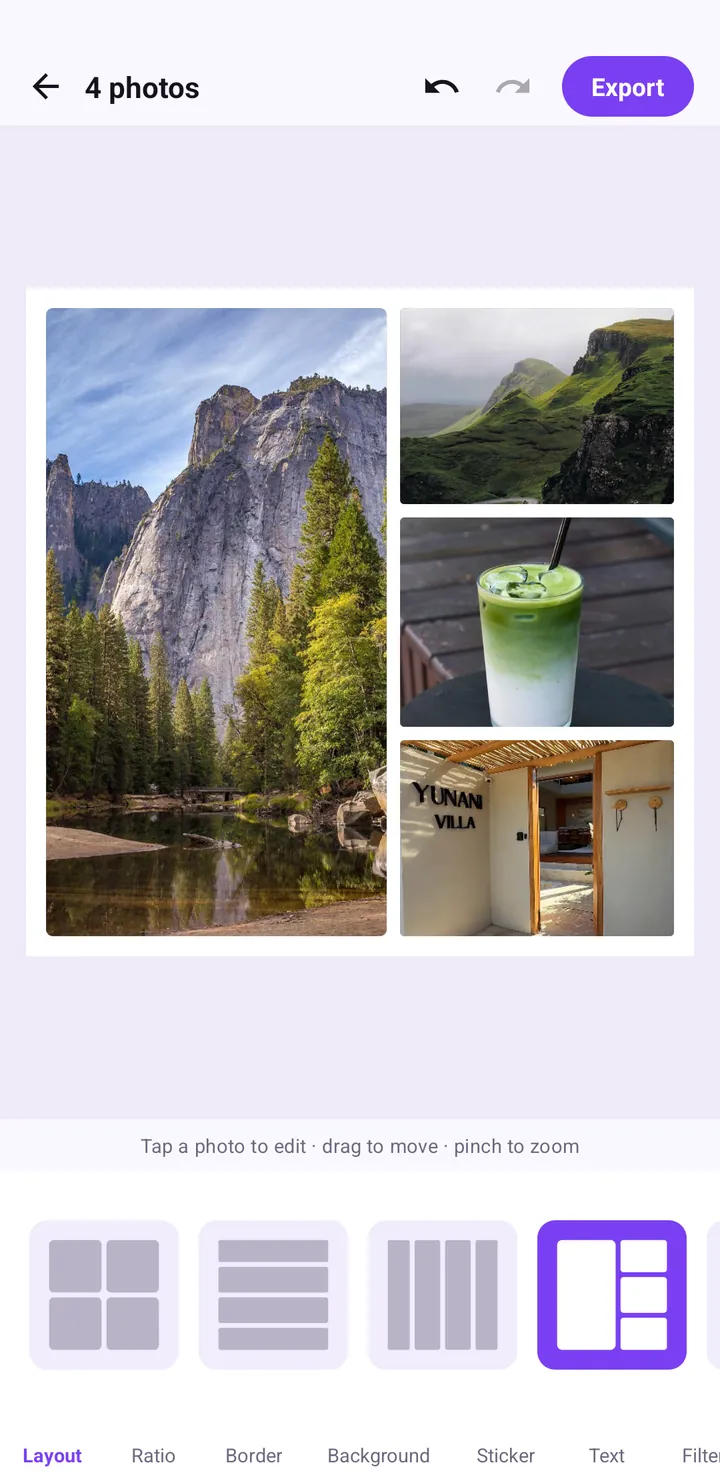
The editor opens on the Layout tab. The title bar shows how many photos you are working with, for example "4 photos". Below the canvas is a row of layout thumbnails; the selected one is highlighted in purple.
Common layout types and when to use them
| Layout | Works best for |
|---|---|
| Even grid (for example 2 by 2) | Photos of equal importance, like four friends or four dishes. |
| Stacked rows | Wide landscape photos, panoramas, a timeline from top to bottom. |
| Side-by-side columns | Tall portraits and full-length outfit shots. |
| One large plus smaller cells | A clear hero photo with supporting details. This is the layout in our example. |
Scroll the thumbnail row sideways to see more options. Tap any thumbnail to apply it instantly; your photos re-flow into the new cells, so it costs nothing to try several.
If one photo is clearly the best, choose a layout with one large cell. The eye goes to the biggest image first, so put your strongest shot there.
Step 3: frame each photo inside its cell
A layout decides where the cells are; you decide what part of each photo shows. The hint under the canvas explains the gestures: "Tap a photo to edit · drag to move · pinch to zoom".
Drag to reposition
Each photo fills its cell, so part of it may be hidden. Drag inside a cell to slide the photo and choose which part is visible. Use this to keep faces, horizons and the subject of the shot inside the frame.
Pinch to zoom
Pinch outward with two fingers to zoom into a photo within its cell, or inward to zoom back out. Zooming is useful for making a small detail, like a drink or a sign, the clear subject of a small cell.
Tap to edit
Tap a photo to select it for editing. This is the starting point when you want to work on one image rather than the whole collage.
Undo is your safety net
The curved arrows at the top of the editor are undo and redo. If a drag or zoom goes wrong, tap undo and try again.
Step 4: set the ratio for where you will post
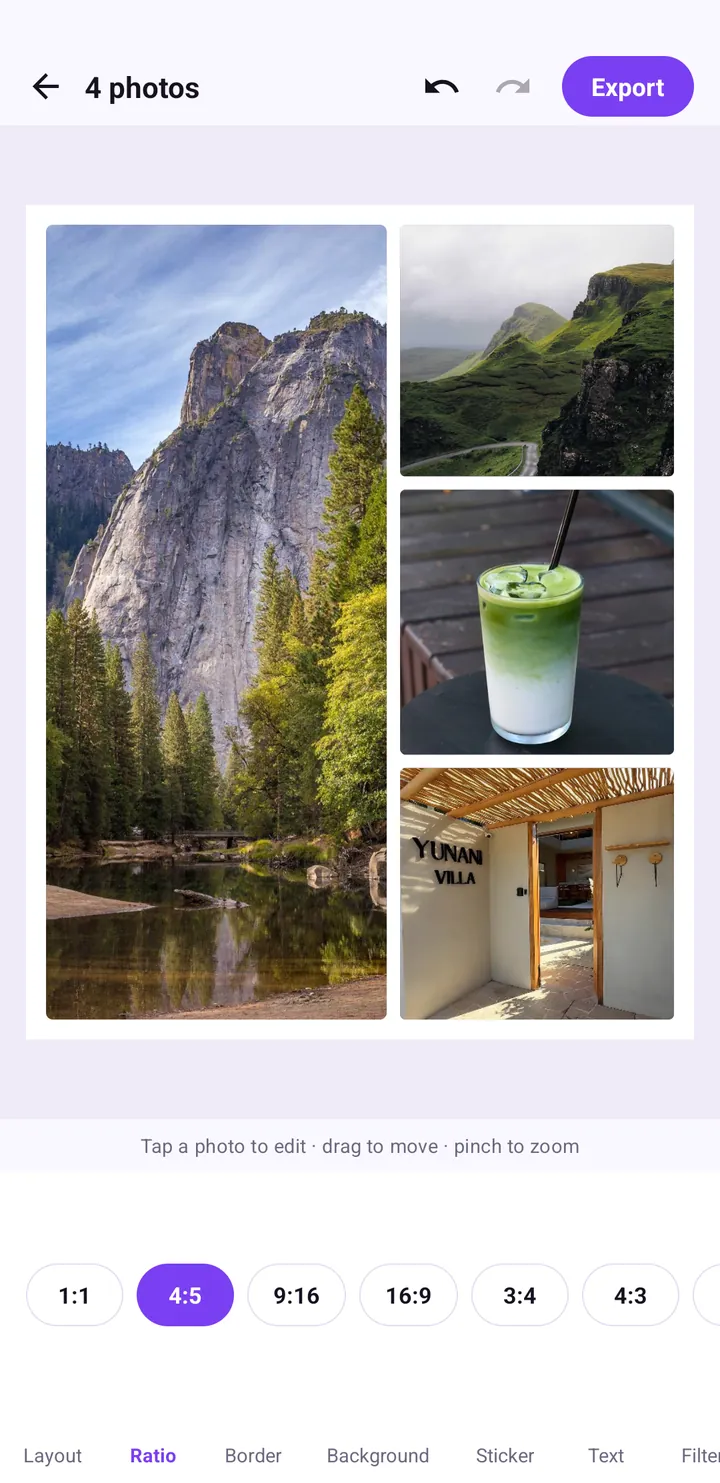
The Ratio tab sets the shape of the whole canvas. This matters more than it seems: if your collage shape does not match the place you post it, the app you post to may crop it or add bars.
The seven ratios
- 1:1: square. Safe everywhere, especially profile grids.
- 4:5: tall portrait. Takes up more screen in a feed than a square.
- 9:16: full-screen vertical, for Stories, Reels covers and status updates.
- 16:9: widescreen, for video thumbnails or desktop wallpapers.
- 3:4 and 4:3: classic photo proportions, tall or wide.
- 5:4: slightly wide, close to square.
For a deeper look at which ratio suits which platform, see our guide on Story, TikTok and feed-ready collages.
Step 5: adjust margin, gap and corners
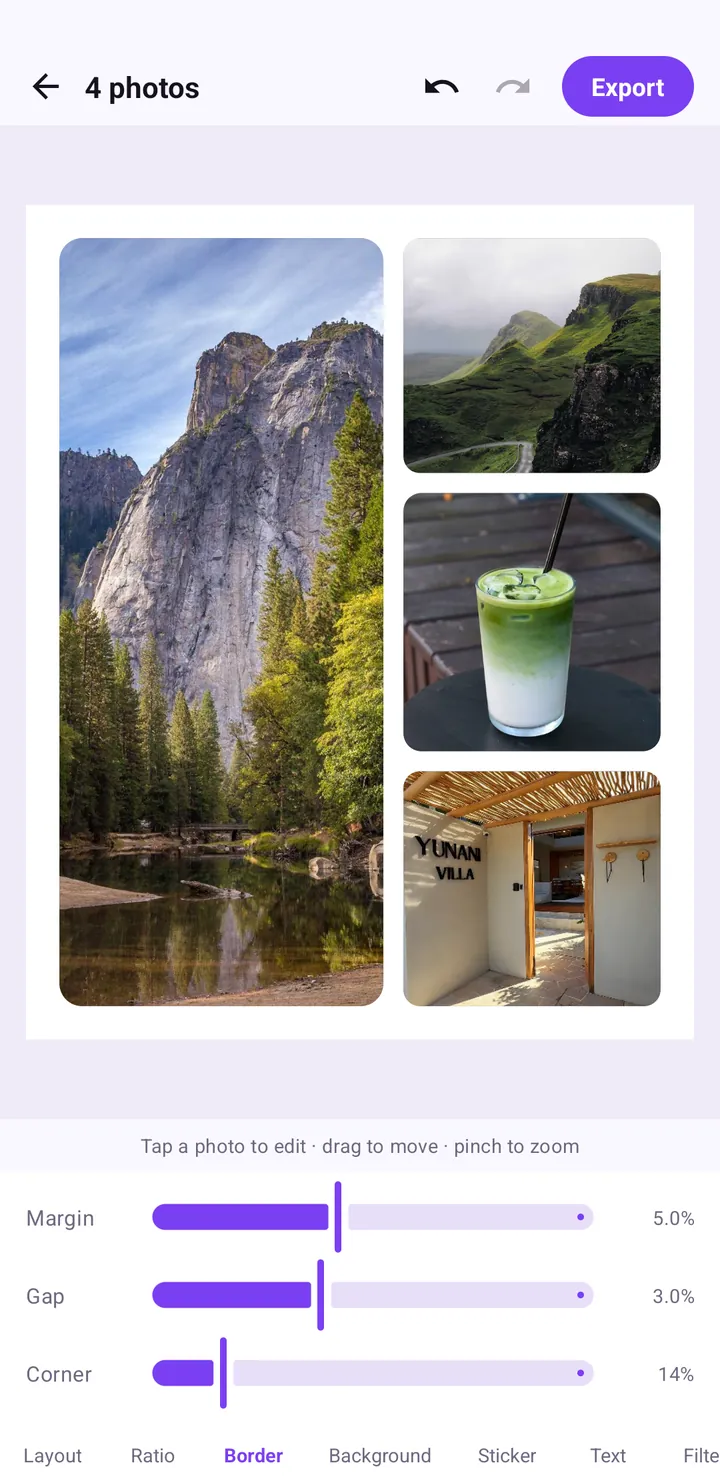
Spacing is the single biggest difference between a collage that looks amateur and one that looks designed. The Border tab gives you three sliders, each showing its current value as a percentage.
Margin
Margin is the space between the photos and the outer edge of the canvas. A small margin frames the collage like a print with a white border. In our example it is set to 5.0%.
Gap
Gap is the space between photos. Around 2 to 4 percent keeps photos clearly separated without wasting space. Our example uses 3.0%.
Corner
Corner rounds the corners of each photo cell. At 0 the cells are sharp rectangles; higher values give soft, friendly corners. 14% gives a modern, app-like look.
Keep Margin and Gap similar. When the outer border is much thicker or thinner than the space between photos, the collage tends to look unbalanced.
Step 6: choose a background
With any margin or gap, the background shows through. The Background tab offers plain colours and subtle patterns. Tap a swatch to apply it.
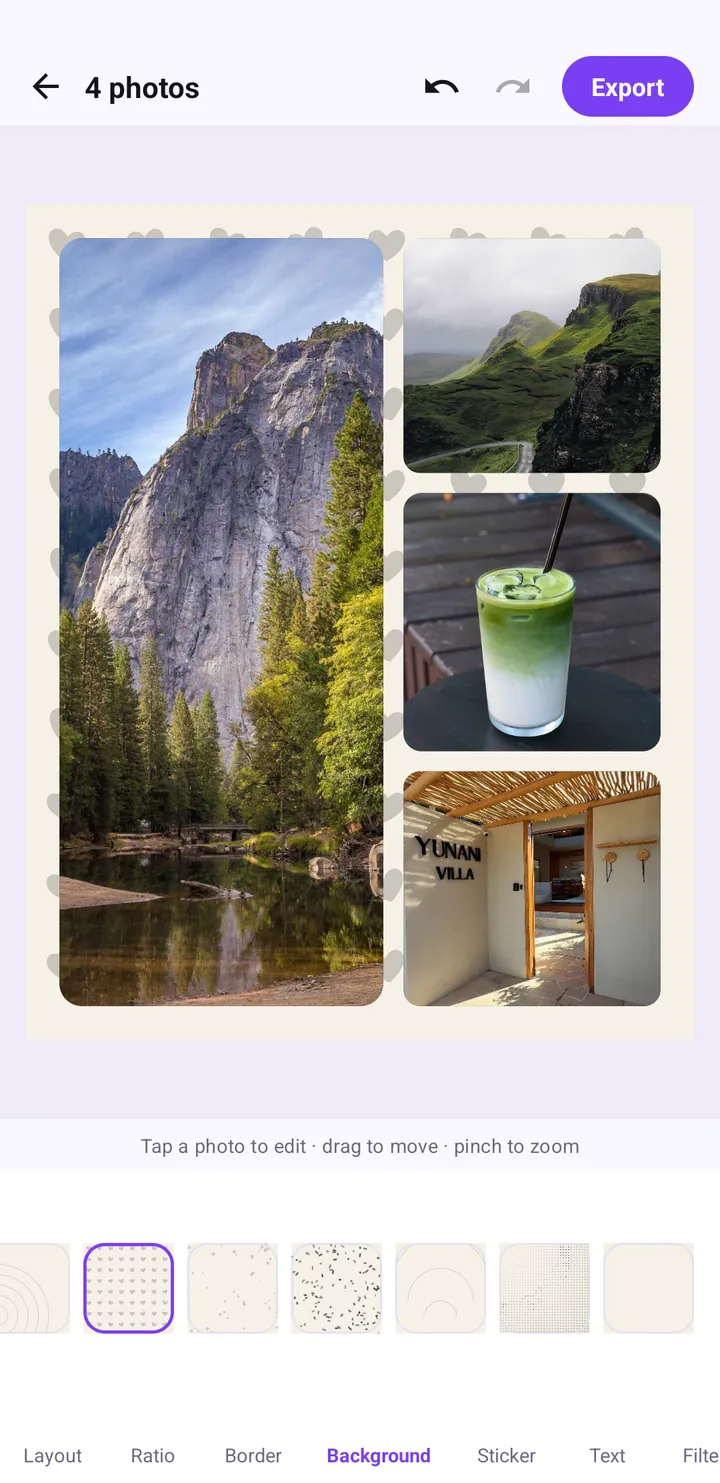
- White or cream: clean and classic, like a photo print.
- Dark colours: dramatic, and they make bright photos glow.
- Patterns: playful. The hearts pattern in our example suits couples and birthdays.
Our ratio, border and background guide goes further into combinations that work.
Step 7: finish and export
At this point your collage has a solid structure. You can stop here, or add finishing touches on the Sticker, Text and Filter tabs. When you are ready, tap Export.
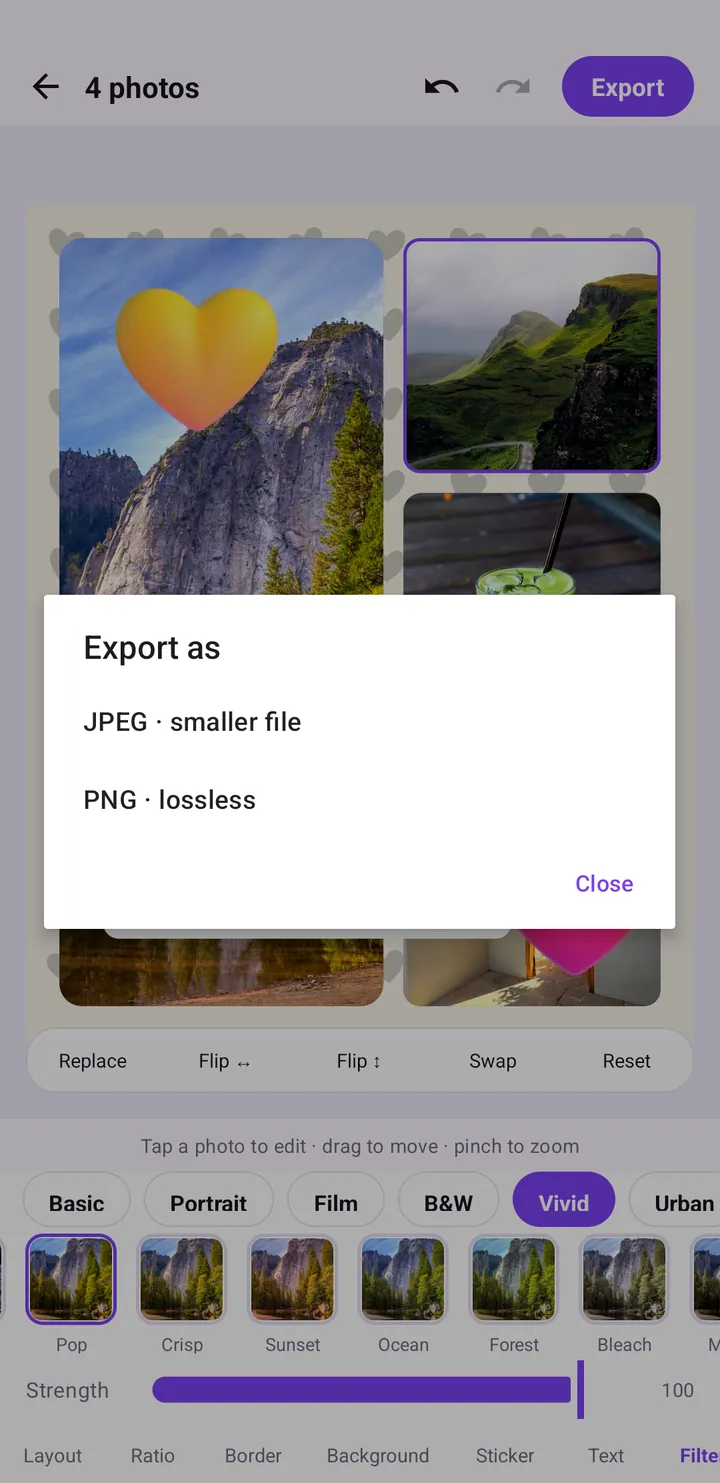
- Tap Export in the top-right corner.
- Under Export as, choose JPEG · smaller file for social media or PNG · lossless for maximum quality.
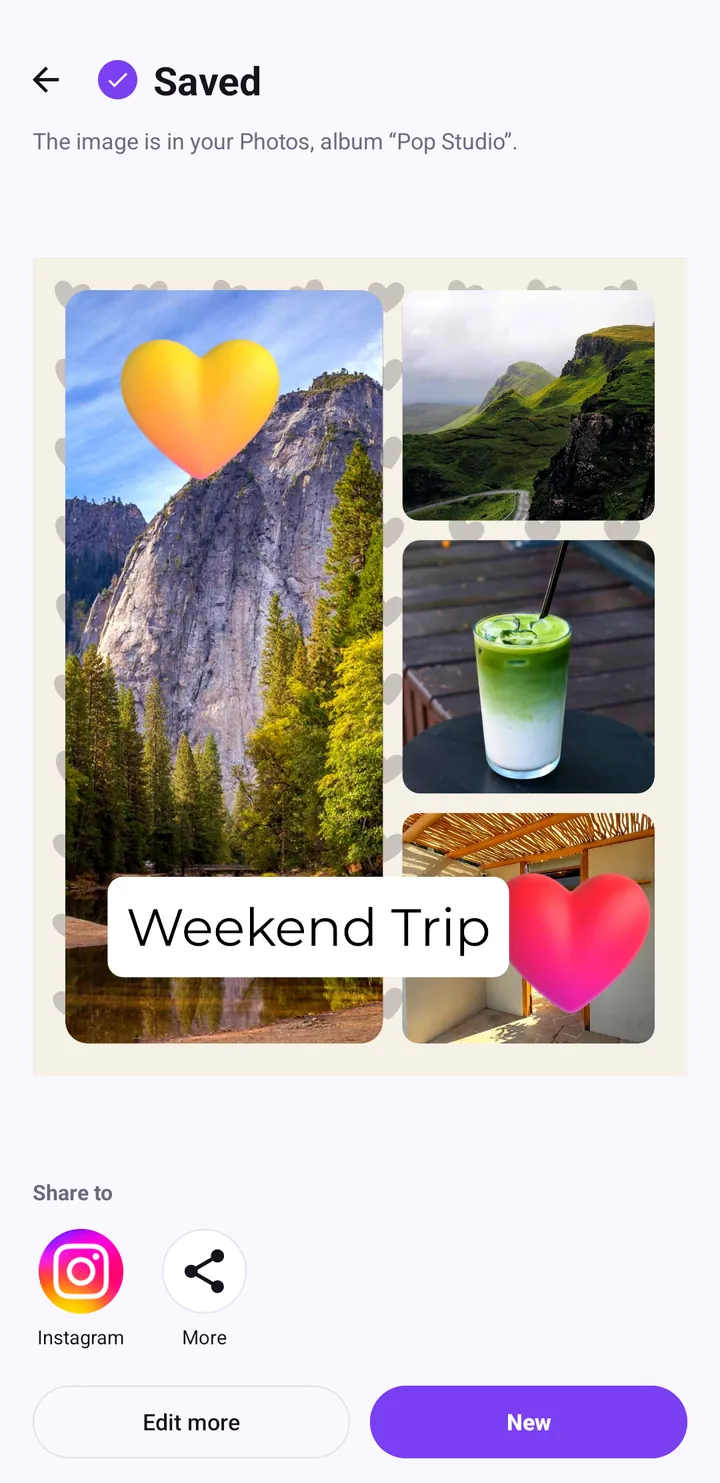
- The Saved screen confirms the image is in your Photos, in the "Pop Studio" album.
- Tap Instagram or More to share, Edit more to keep working, or New to start another collage.
The complete checklist
Use this list each time you make a collage. It takes a couple of minutes once you are used to it:
- Tap Collage and select 2 to 9 photos, then tap Done.
- On Layout, choose an arrangement that matches your photos' orientation.
- Drag and pinch inside each cell so subjects and faces are fully visible.
- On Ratio, choose the shape for your destination: 1:1, 4:5 or 9:16 cover most needs.
- On Border, set Margin and Gap to similar values and add some Corner.
- On Background, pick a colour or pattern that suits the mood.
- Optionally decorate, then tap Export.
Common collage mistakes and how to fix them
Faces cut by the cell edge
This happens when a tall portrait sits in a wide cell. Drag the photo inside the cell to recentre it, pinch to zoom out if your layout allows, or switch to a layout with taller cells.
Everything looks crowded
Raise Gap and Margin a few points, or use fewer photos. Nine photos in a 1:1 square leaves small cells; the same nine photos in 9:16 have more room.
The collage gets cropped after posting
The ratio does not match the platform. Re-open the collage, change Ratio to the right shape, check framing again and re-export.
Photos look like they came from different trips
Different cameras and light give different colours. Apply one filter to the whole collage on the Filter tab and lower Strength until it looks natural. Our filters guide explains each option.
Too many photos competing
If no photo stands out, pick a layout with one large cell and give it your best shot. Collage is about hierarchy as much as quantity.
When a poster template is the better choice
If you want a finished design with titles and decorations already in place, a poster template may be faster than building a collage from scratch. Templates come with their own photo slots, text and stickers, and you just pick the photos. See how to make a trip poster with templates. If you are still learning the app, the Pop Studio beginner guide covers the full flow from the home screen.
Wrap-up
Making a photo collage on Android comes down to four decisions: which layout, how each photo is framed, which ratio, and how much space. Get those right in Pop Studio and almost any set of photos will look good together. Then add a sticker, a short caption or a filter if you like, export as JPEG or PNG, and share it straight from the Saved screen.
Frequently asked questions
How do I make a photo collage on Android?
In Pop Studio, tap Collage, select up to 9 photos in the photo picker and tap Done. Choose a layout on the Layout tab, set the Ratio and Border, then tap Export.
How do I stop faces being cut off in a collage?
Drag the photo inside its cell to reposition it and pinch to zoom out. If the photo is tall and the cell is wide, switch to a layout with taller cells.
What spacing looks best in a collage?
Keep Margin and Gap similar, around 2 to 5 percent each, and add a little Corner rounding. Our example uses Margin 5.0%, Gap 3.0% and Corner 14%.
Which ratio should I use for a collage?
Use 1:1 for square posts, 4:5 for tall feed posts and 9:16 for Stories. Pop Studio also offers 16:9, 3:4, 4:3 and 5:4.
Keep reading
Collage border spacing, ratio and background colour, explained
How the Ratio, Border and Background tabs work: which ratio to choose for feed or Stories, the Margin, Gap and Corner settings that look clean, and how to pick a background.
Read the guide →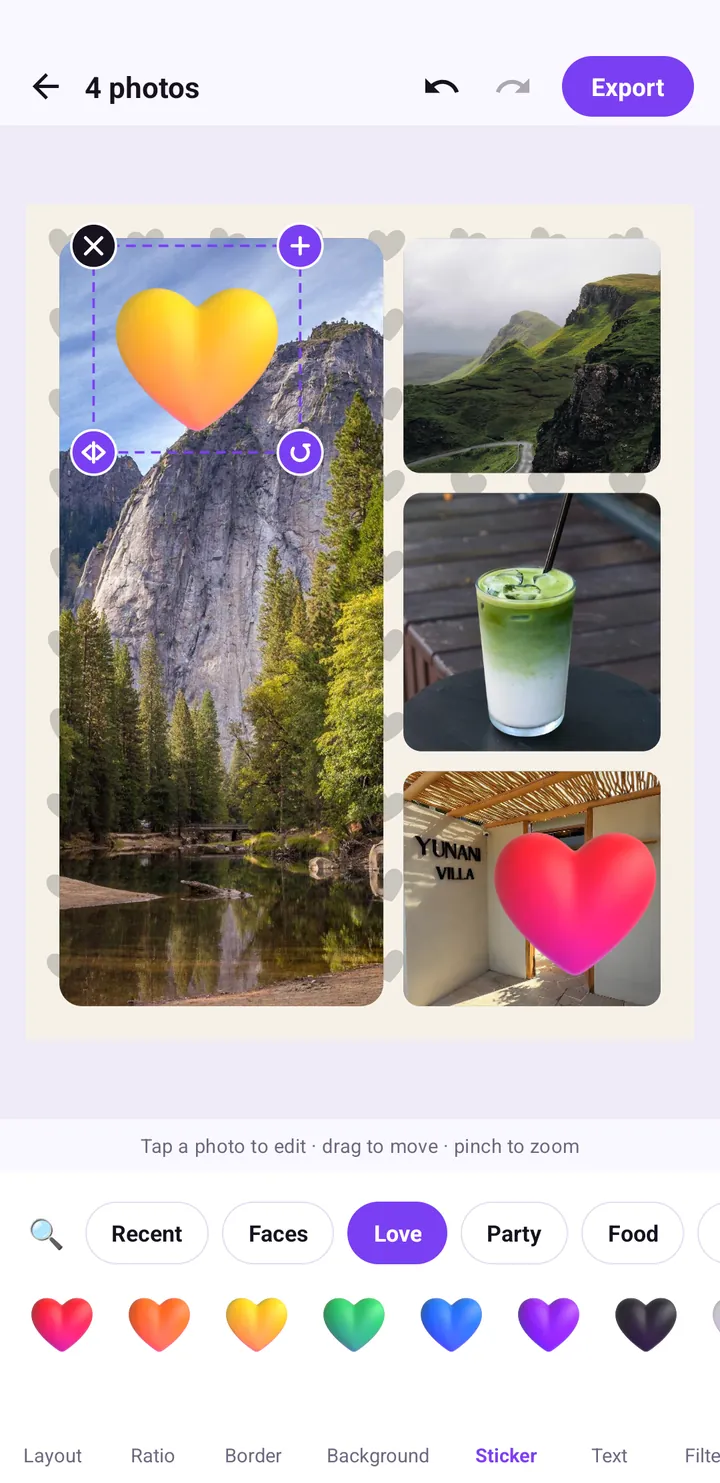
12 collage ideas for birthdays, couples, trips, food and friends
Twelve collage ideas for birthdays, couples, trips, food and friends, each with the exact layouts, ratios, stickers and poster templates to use in Pop Studio.
Read the guide →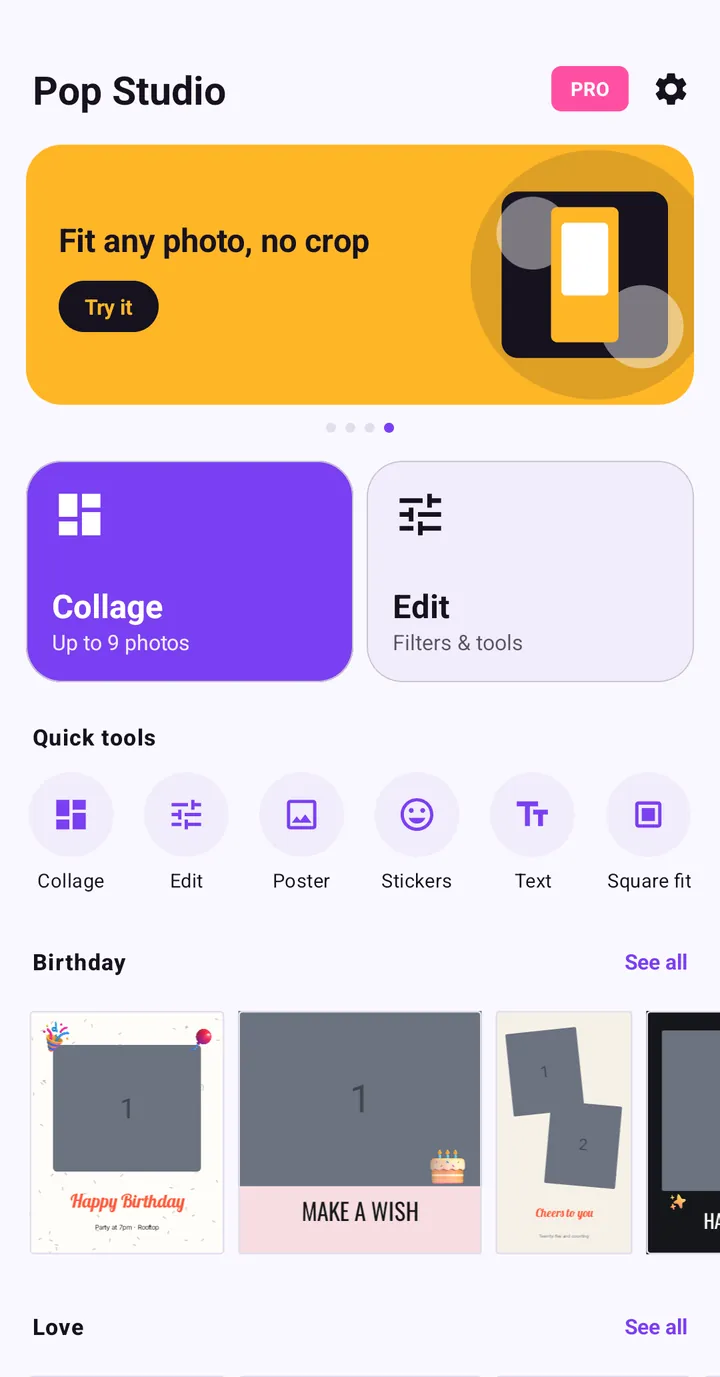
Pop Studio App Tutorial: Make Your First Photo Collage
New to Pop Studio? This beginner guide walks you from the home screen to a finished photo collage saved in your gallery, one tap at a time.
Read the guide →Add Stickers to Photos: Every Category and How to Use Them
Everything about stickers in Pop Studio: what each category holds, how to search, how to move, scale, rotate and remove stickers, and placement tips that avoid clutter.
Read the guide →